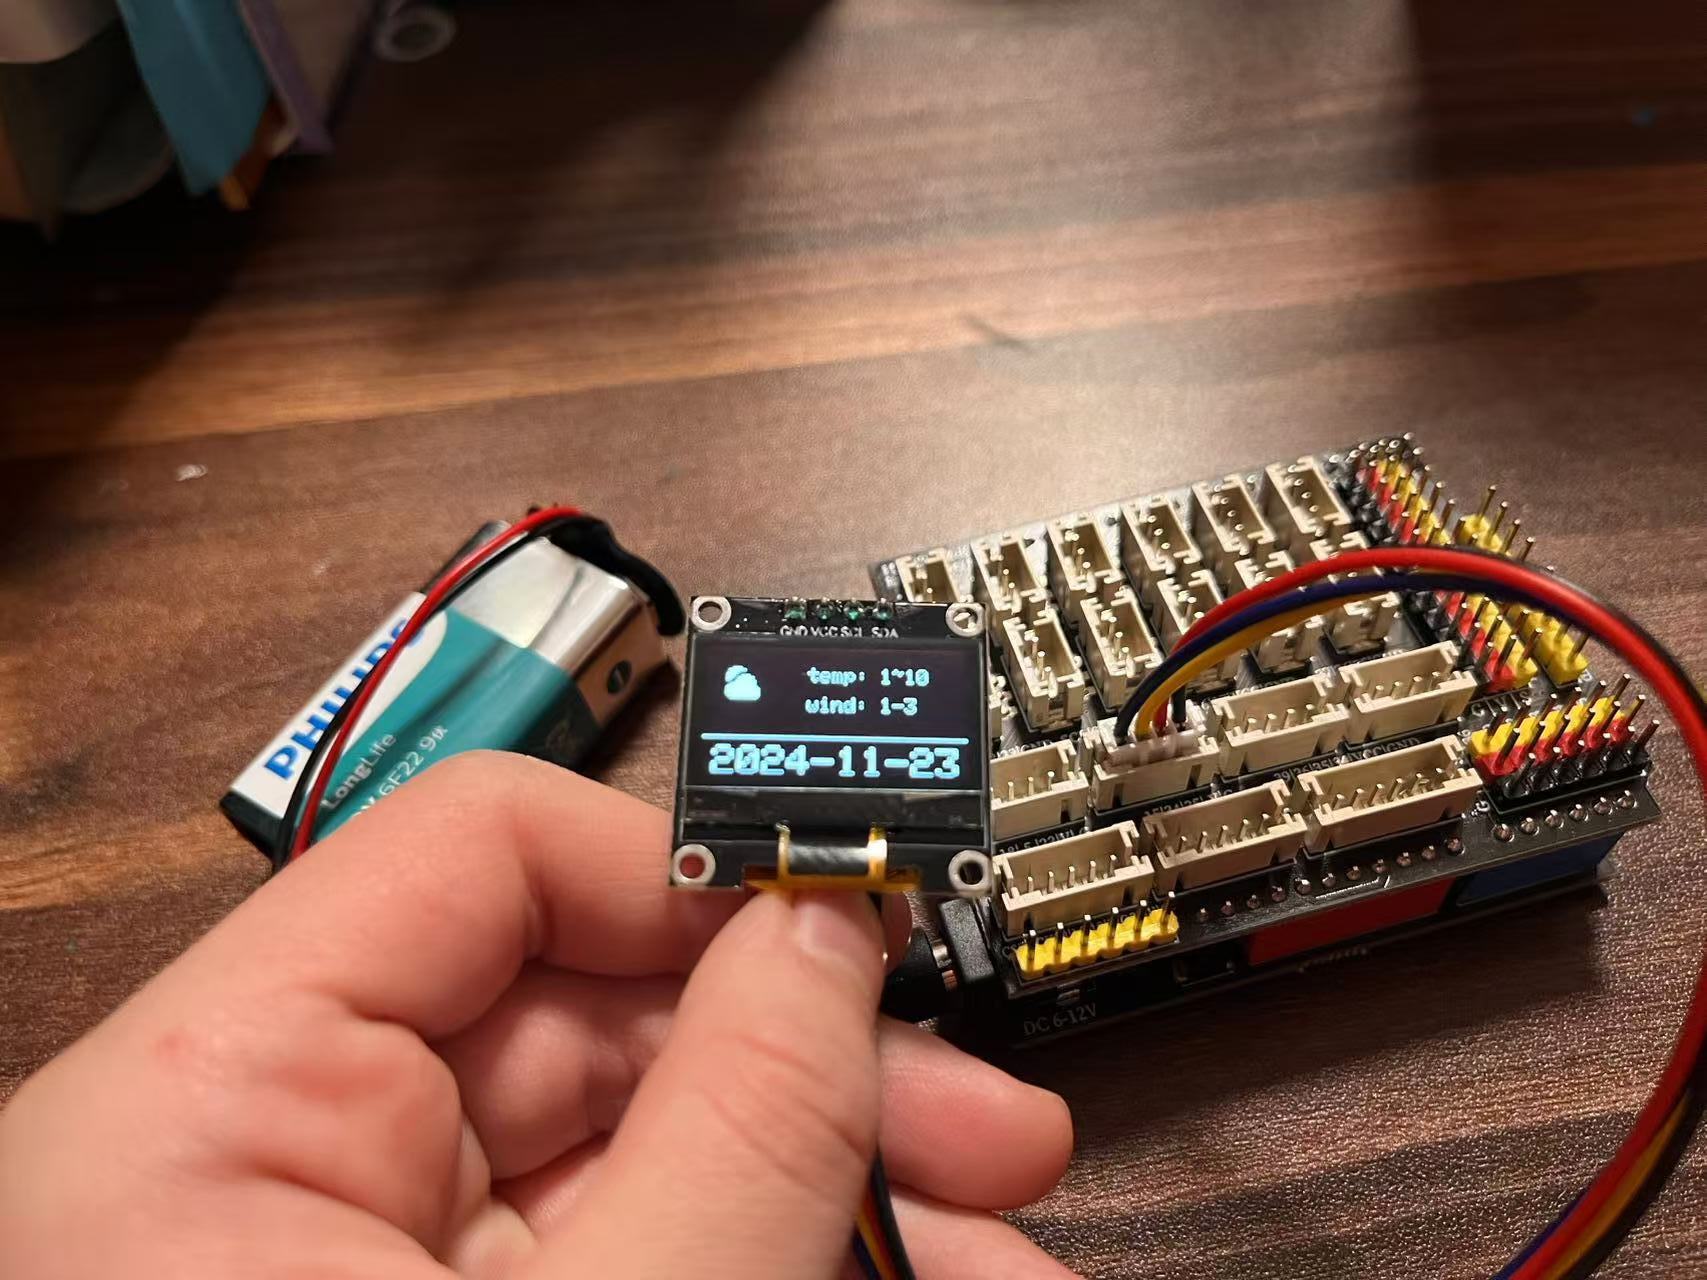
玩转Arduino(4)-天气预报

硬件
- ESP32 开发板
- 0.96寸OLED 128*64
思路
ESP32 开发板自带WIFI和蓝牙
Step1 使用开发板连接家里的WIFI热点
注意修改代码中的WIFI SSID和password
Step2 使用和风天气API,获取天气信息
和风天气的API默认访问https://devapi.qweather.com
需要使用SSL,对单片机开发非常麻烦,我重新封装代理了对应接口,简化了调用过程。
可使用
http://qweather.vearne.com/v7/weather/3d?location=101010100&lang=en&key=xxx访问和风天气API,注意修改秘钥key
Step3 解析Response,将天气信息显示在OLED显示屏幕上
代码
完整代码 weather
#include <WiFi.h>
#include <HTTPClient.h>
#include <Arduino.h>
#include <Arduino_JSON.h>
#include <SPI.h>
#include <Wire.h>
#include <Adafruit_GFX.h>
#include <Adafruit_SSD1306.h>
#include "BitmapData.h"

#define LOGO_HEIGHT 16
#define LOGO_WIDTH 16
#define WEATHER_X 50
const char *ssid = "vearne-Guest";    // Change this to your WiFi SSID
const char *password = "xxxx";  // Change this to your WiFi password
// Change key to your api key
// https://dev.qweather.com/docs/configuration/project-and-key/
const char *url = "http://qweather.vearne.com/v7/weather/3d?location=101010100&lang=en&key=xxx";

#define SCREEN_WIDTH 128  // OLED display width, in pixels
#define SCREEN_HEIGHT 64  // OLED display height, in pixels

// Declaration for an SSD1306 display connected to I2C (SDA, SCL pins)
#define OLED_RESET -1  // Reset pin # (or -1 if sharing Arduino reset pin)
Adafruit_SSD1306 display(SCREEN_WIDTH, SCREEN_HEIGHT, &Wire, OLED_RESET);

void setup() {
  Serial.begin(115200);
  while (!Serial) {
    delay(100);
  }

  // SSD1306_SWITCHCAPVCC = generate display voltage from 3.3V internally
  if (!display.begin(SSD1306_SWITCHCAPVCC, 0x3C)) {
    Serial.println(F("SSD1306 allocation failed"));
    for (;;)
      ;  // Don't proceed, loop forever
  }

  // We start by connecting to a WiFi network

  Serial.println();
  Serial.println("******************************************************");
  Serial.print("Connecting to ");
  Serial.println(ssid);

  WiFi.begin(ssid, password);

  while (WiFi.status() != WL_CONNECTED) {
    delay(500);
    Serial.print(".");
  }

  Serial.println("");
  Serial.println("WiFi connected");
  Serial.println("IP address: ");
  Serial.println(WiFi.localIP());
}

void loop() {
  if (WiFi.status() == WL_CONNECTED) {
    HTTPClient http;

    // 开始请求
    // http.addHeader(const String &name, const String &value)
    http.begin(url);

    // 发送 GET 请求
    int httpCode = http.GET();

    // 如果请求成功
    if (httpCode > 0) {
      // 读取响应
      String payload = http.getString();
      Serial.println("响应内容:");
      Serial.println(payload);
      // 结束请求
      http.end();
      JSONVar weatherData = JSON.parse(payload);
      if (JSON.typeof(weatherData) == "undefined") {
        Serial.println("Parsing input failed!");
        return;
      }
      // 获取第一天的天气信息
      JSONVar firstDay = weatherData["daily"][0];
      String tempMax = (const char *)firstDay["tempMax"];
      String tempMin = (const char *)firstDay["tempMin"];
      String windScale = (const char *)firstDay["windScaleDay"];
      String fxDate = (const char *)firstDay["fxDate"];
      String iconDay = (const char *)firstDay["iconDay"];

      switch (iconDay.toInt()) {
        case 100:
          drawOLED(sun, fxDate, tempMin, tempMax, windScale);
          break;
        case 101:
          drawOLED(cloudy, fxDate, tempMin, tempMax, windScale);
          break;
        case 102:
          drawOLED(cloud, fxDate, tempMin, tempMax, windScale);
        default:
          drawOLED(rain, fxDate, tempMin, tempMax, windScale);
          break;
      }

    } else {
      Serial.println("WiFi 未连接");
    }

    delay(1000 * 300);  // 等待 5min
  }
}

void drawOLED(const uint8_t *bitmap, String dateStr, String tempMin, String tempMax, String windScale) {
  display.clearDisplay();

  // weather icon
  display.drawBitmap(
    10, 10,
    bitmap, LOGO_WIDTH, LOGO_HEIGHT, 1);
  // temp & wind
  display.setTextSize(1);       // Normal 1:1 pixel scale
  display.setTextColor(WHITE);  // Draw white text
  display.setCursor(WEATHER_X, 10);
  display.print("temp: ");

  String s = "";
  s.concat(tempMin);
  s.concat("~");
  s.concat(tempMax);
  display.println(s);
  display.setCursor(WEATHER_X, 25);
  display.print("wind: ");

  display.println(windScale);
  // line
  display.drawLine(0, 45, display.width() - 1, 45, WHITE);
  // date
  display.setTextSize(2);       // Normal 1:1 pixel scale
  display.setTextColor(WHITE);  // Draw white text
  display.setCursor(5, 50);     // Start at top-left corner
  display.println(dateStr);

  display.display();
  delay(1000);
}
库依赖
1.Adafruit_SSD1306
2.Arduino_JSON
3.ArduinoHttpClient
4.WiFi
参考资料
1.wifi
2.esp32-ssd1306-oled-display-arduino-ide
3.和风天气API
作者: vearne
文章标题: 玩转Arduino(4)-天气预报
发表时间: 2024年11月23日
文章链接: https://vearne.cc/archives/40215
版权说明: CC BY-NC-ND 4.0 DEED
